Painting Concrete Floors
This post contains affiliate links. What this means is that if you click on a link and purchase something, I may receive a small percentage of the sale at no extra cost to you. Thank you for supporting Vintagy and Fabulous!
So you are asking yourself why on earth someone would think that painting concrete floors would be better than buying new flooring. The truth is, when you live in the real world on a real budget, you have to solve problems in a new way. Oh, and when I say real budget, I am not talking about someone saying they did a project on a budget and they only spent $5,000. Sweet Pea, $5,000 is steep in the real world.
We have carpet and our house is on a concrete slab. Our 10-year old carpet needs to be replaced so we only have one of two choices, (1) replace the carpet with carpet or (2) replace the carpet with laminate flooring. Just a little hiccup in owning a home on a concrete slab.
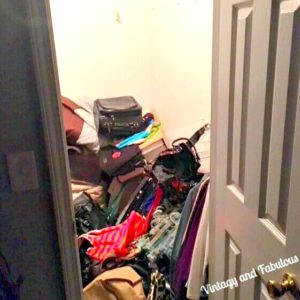
I have priced carpet and laminate for our 1,533 square foot home. Well, let me tell you neither of these options are in our budget. So when my side of our walk in closet came crashing down I asked my husband (Mr. Fabulous) if we cold paint our concrete floors. He said that we would pull the carpet up and use our closet as a trial run to see how it would turn out. After all, if it did not work no one would see our closet.
When we pulled up the carpet, the closet floor had a crack in it from one side all the way to the other. My heart just sank when I saw it. Luckily, God blessed me with an awesomely handy husband who can do anything. He told me that the crack can be repaired and not to worry.
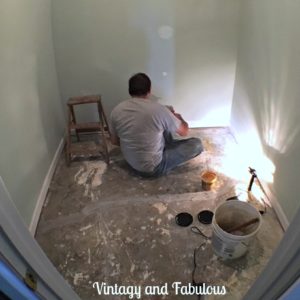
Quikrete Concrete Patching Compound was used to fill in the crack. Once that had cured (we waited a full 24-hours) then we smoothed it out. To do this took longer than I had planned in my head. I cannot imagine how long it would have taken if we had not had an angle grinder like this one to use. Be sure to use a concrete grinding wheel on your angle grinder or else it will take you forever to smooth out the patching compound.
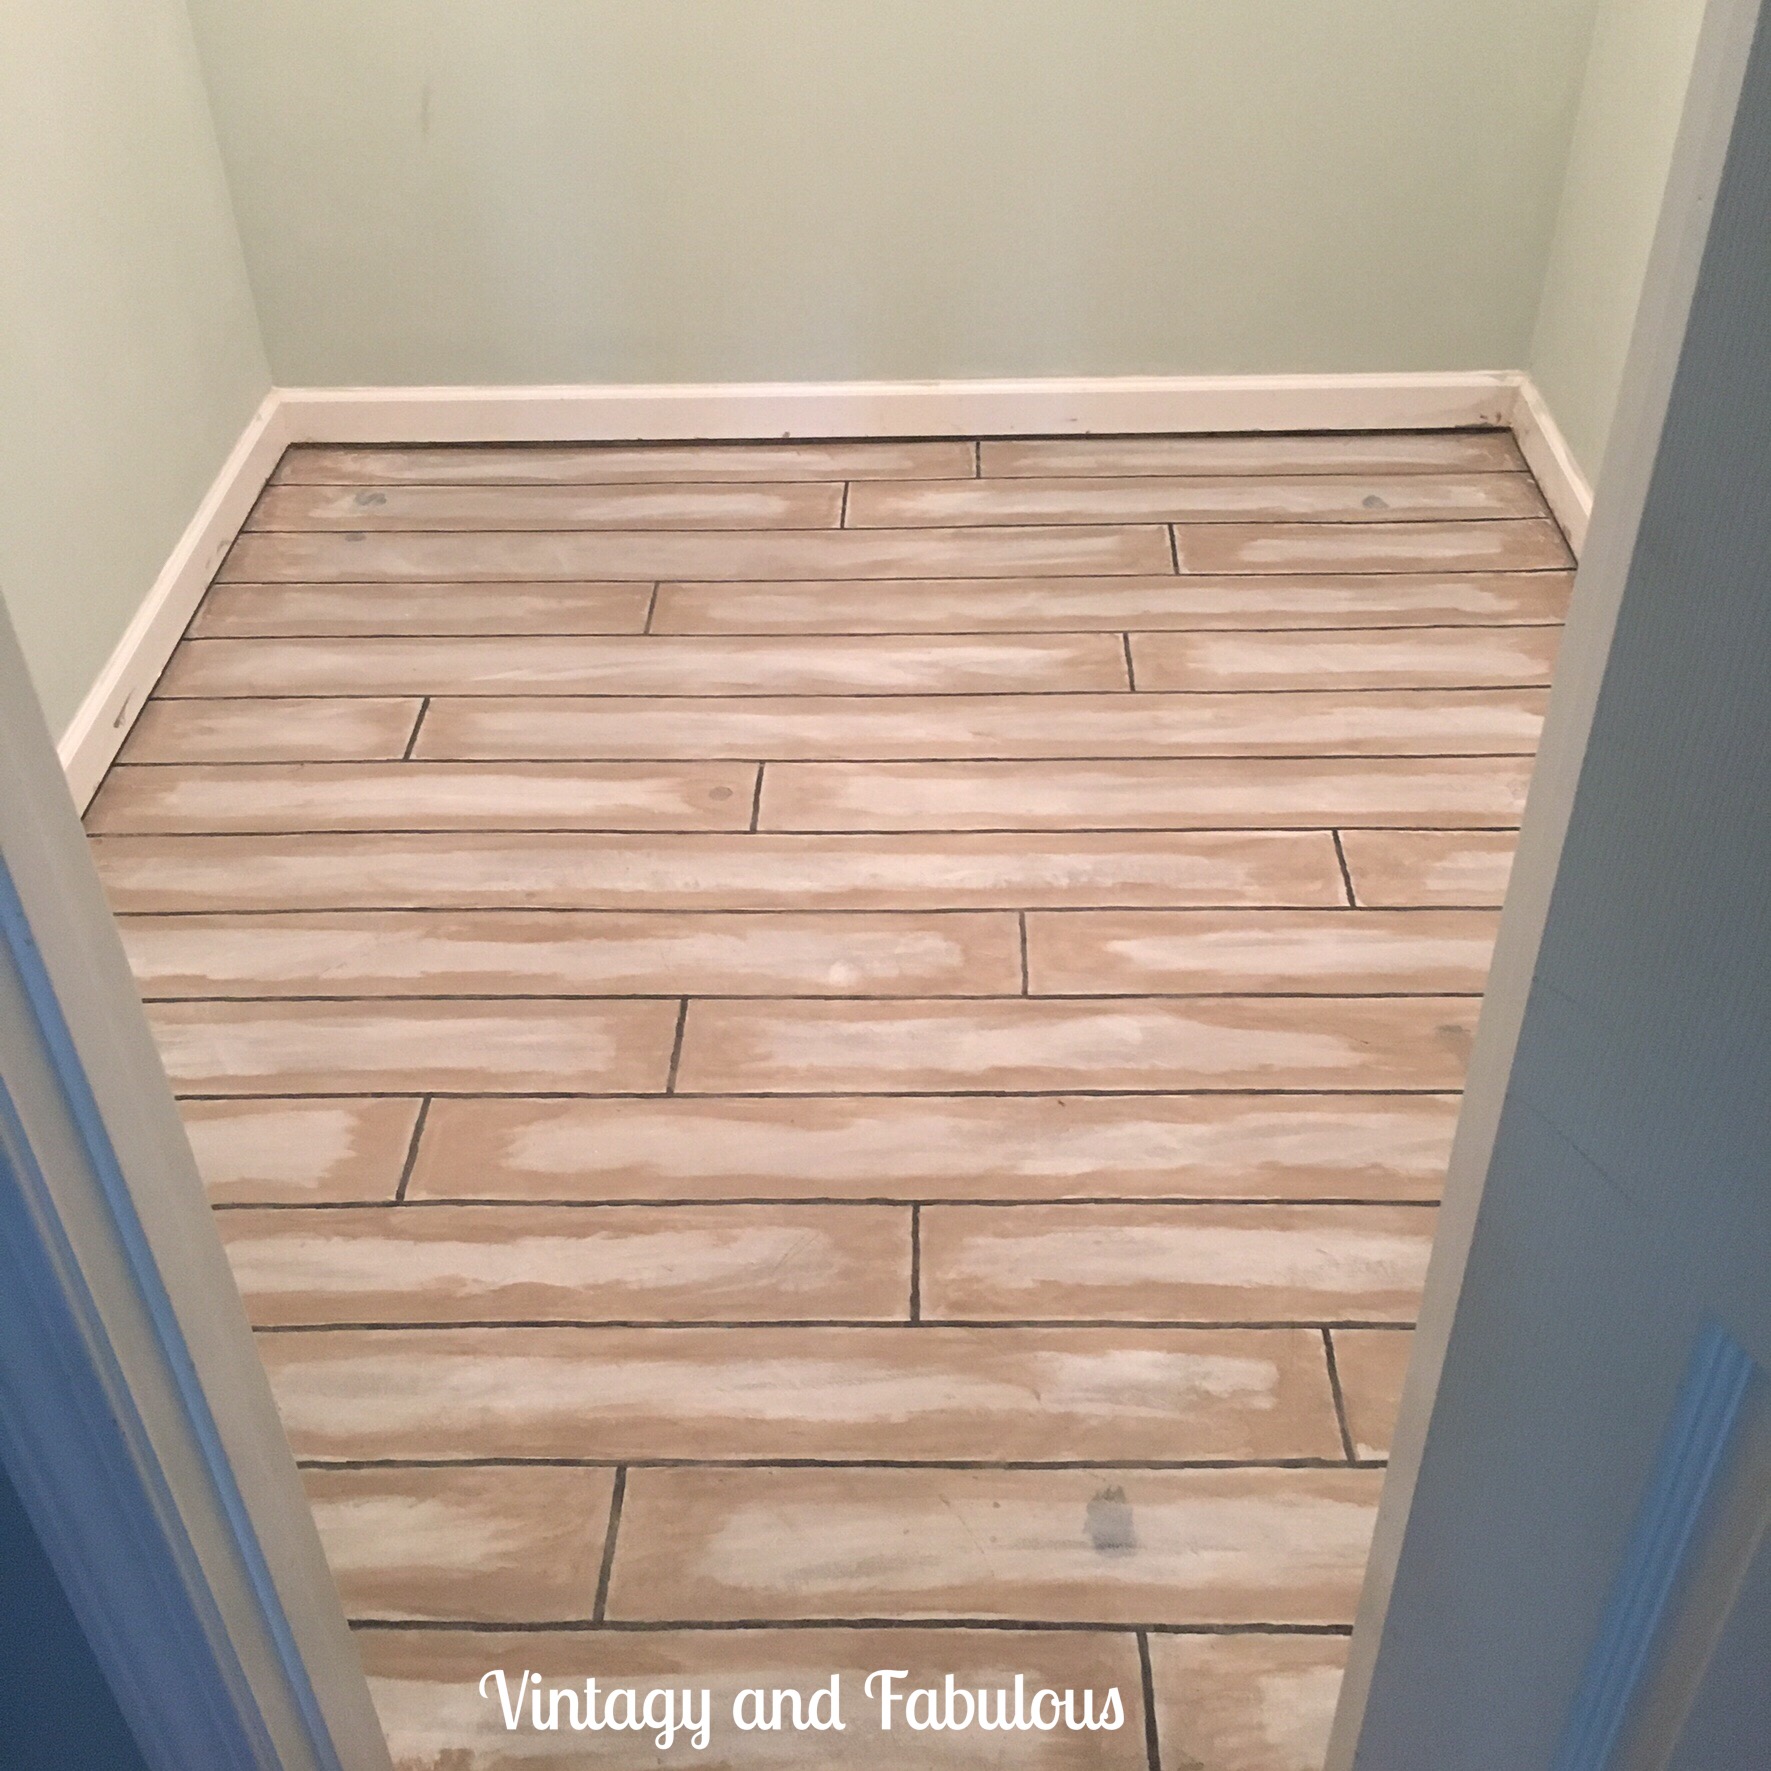
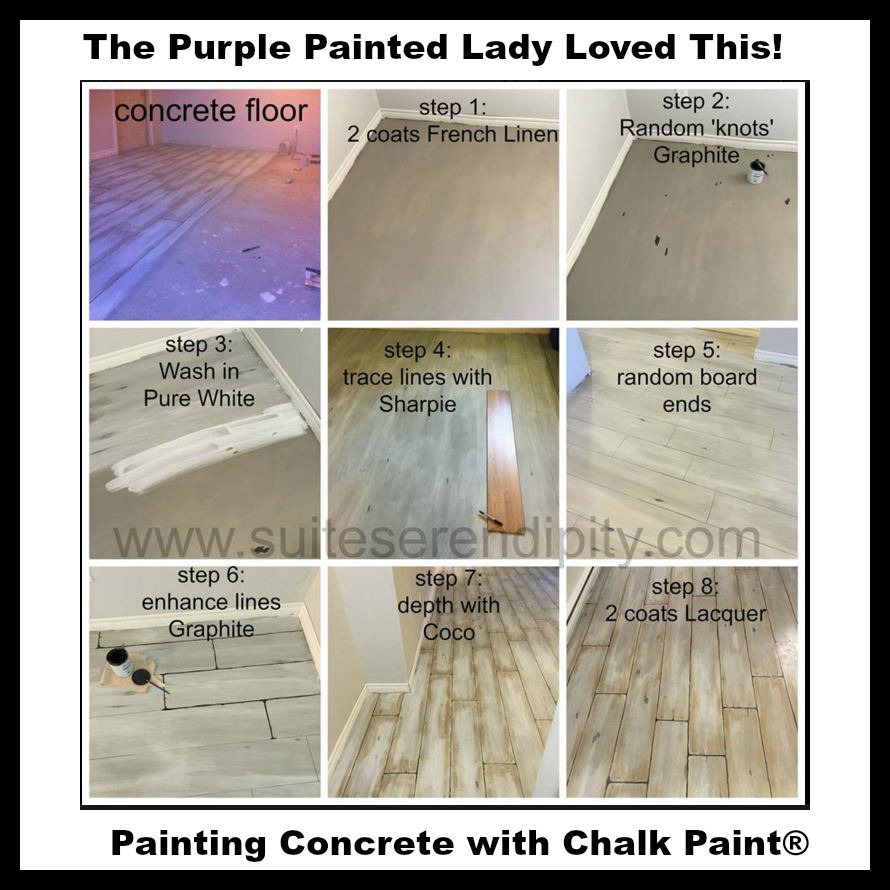
We love the look wood flooring has to offer, so that is the painting technique we went searching for. Of course, Pinterest had hundreds of techniques pinned. Many of them would have taken more time than we had and were way over my patience level. We both work full time jobs so we needed something that would not take up a lot of time. Especially since the closet is a trial run for the entire house. We searched and searched and finally found this one that struck our fancy. We are are big fans of Annie Sloan Chalk Paint so we were all over this idea. As you can see in the graphic, they went into more detail than we did.
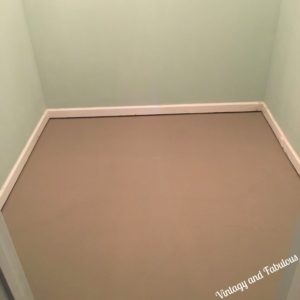
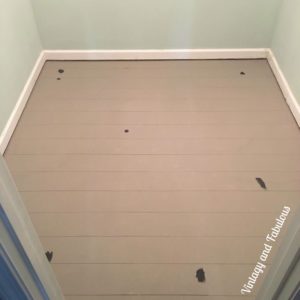
After we patched the crack and smoothed it all out we cleaned the floor. We did not do anything special to clean the floor n preparation for painting. We just swept the floor twice, vacuumed once, and mopped twice. The first step was to paint the floor with two coats of French Linen.
Of course we made sure to allow the first coat to dry thoroughly before we applied the second coat. The great thing about using Annie Sloan Chalk Paint is that is does not take long to dry. Once the second coat had dried we then used Graphite to make the random knots. We did not add too many as the shelving Scott will be building will cover the sides of the floor. The closet rebuild will be another post.
Next we drew the vertical lines using a Sharpie just as our guide. We did not have a wood piece to use as a template so Scott just used a straight edge to draw the lines. Once those were drawn, we white washed the entire floor with a mixture of 1 part Pure White and 1 part water.

Once the white wash had dried I went over the lines with Graphite to make them stand out and once those lines were dry, Scott went in and used an old car tag we had to keep the random board ends straight and we went over those end board lines with Graphite as well.

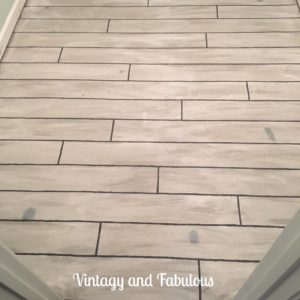
After we were confident that the Graphite paint (our lines) were dry, we then went around the boards with Coco which made the boards come to life. This is what really caught our eye when we were searching for ideas. This just gives so much definition to the entire project.
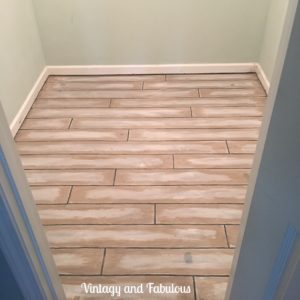
Make sure the Coco is completely dry and then go over the entire floor with lacquer. It is best to do two light coats drying completely in between coats rather than one thick coat.
I must admit that this project was a lot of hard work since Scott had to repair a crack in the concrete before we could do anything. I will also admit that it was worth every single bit.
So there you have it, wood floors on a poor man’s budget. One room down and 8 more to go.
Materials Used:
Quickrete Concrete Patching Compound
Angle Grinder with Concrete Grinding Wheel
Straight Edge and Sharpie
Paint Rollers and Roller Handle
Annie Sloan Chalk Paint – French Linen® (1 quart)
Annie Sloan Chalk Paint – Pure White® (4 ounces)
Annie Sloan Chalk Paint – Graphite® (4 ounces)
Annie Sloan Chalk Paint – Coco® (4 ounces)
Annie Sloan Lacquer® (1 quart)
This was definitely easier on the budget than carpet or laminate flooring. At least it was a lot easier for our budget.
